Choosing the right Sharp Point Drywall Screw is a small decision with major effects on wall strength, finish quality, and installation speed. A suitable screw should match the board thickness, framing material, and working environment. It should also enter cleanly without tearing the paper face.
This guide follows established industry references, including ASTM C1002 for steel drill-free drywall screws and the Gypsum Association’s GA-216 installation recommendations. These documents emphasize proper fastener length, spacing, penetration, and framing compatibility. Manufacturer technical data also matters. For example, USG and National Gypsum installation guidance commonly distinguishes screw selection for wood and metal framing. A screw designed for light-gauge metal may not perform well in dense timber. The point shape can change everything.
Field experience shows a common failure pattern. A screw may appear secure, yet its head sits too deeply and breaks the gypsum paper. Another may leave the surface proud, creating visible bumps after joint compound dries. That sounds simple. It is not.
Professional construction reports continue to highlight productivity, material waste, and rework as important cost pressures. Dodge Construction Network and FMI research have repeatedly connected labor efficiency with project profitability. Choosing the correct Sharp Point Drywall Screw supports all three areas. It reduces stripped heads, improves board holding, and limits unnecessary repairs. Still, no selection chart replaces a small site test. Check the screw with the actual board and framing. A perfect specification can fail in unfamiliar conditions. Look closely at coating, thread design, length, head profile, and corrosion exposure before ordering bulk quantities.
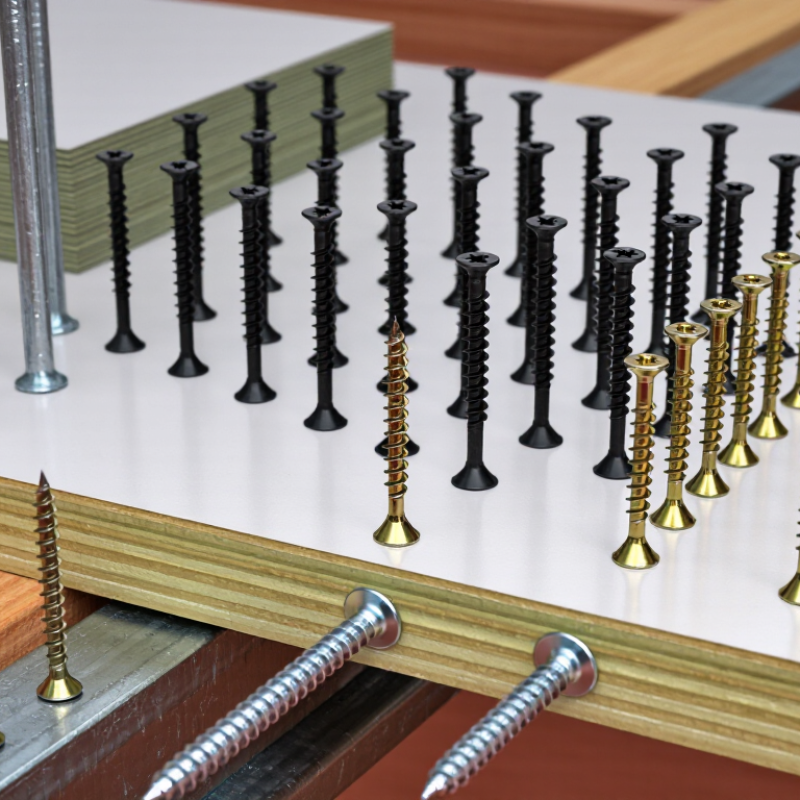
How to Choose the Right Sharp Point Drywall Screw?
A sharp point drywall screw is designed to start quickly in gypsum board and light-gauge framing. Its pointed tip pierces paper cleanly, reducing surface tearing around the entry hole. The bugle-shaped head sits slightly below the board surface without crushing the gypsum core. That detail matters during joint finishing.
ASTM C1002 covers mechanical requirements for steel drill screws used in gypsum panel systems. The 2024 Gypsum Association recommendations commonly place screws about 12 to 16 inches apart on wall framing, depending on board type and installation conditions. These figures are practical guidance, not a universal promise. Framing thickness, humidity, and board weight can change the result.
Choose a fine-thread screw for metal studs and a coarse-thread version for wood framing. Match the screw length carefully. It should pass through the panel and enter the framing without excessive penetration. On site, I check the first few fasteners by hand and inspect the paper face. A torn face usually signals excessive torque, poor alignment, or an unsuitable point design. The U.S. Census Bureau reported 1,452,500 privately owned housing completions in 2023, showing the continuing scale of drywall installation work. Yet speed can encourage careless selection. I have made that mistake. A sharper point does not automatically mean better holding power. Test the screw in the actual substrate.
Use this comparison table to match screw point design, thread pattern, size, coating, and installation method with common drywall fastening conditions.
| Selection Dimension | Typical Option | Design or Specification | Recommended Use | Key Benefit | Important Limitation |
|---|---|---|---|---|---|
| Point Style | Sharp bugle point | A pointed tip that starts penetration quickly and a bugle-shaped head that helps seat drywall without cutting deeply into the paper face. | General installation of gypsum drywall panels onto wood or light-gauge metal framing. | Fast starting, easy positioning, and reduced risk of tearing the drywall paper when properly driven. | It is not intended to replace a self-drilling screw when fastening into heavier steel. |
| Thread Type | Coarse thread | Wider-spaced threads with a deeper profile than fine-thread versions. | Drywall attached to wood studs, wood furring strips, or other soft substrates. | Provides strong thread engagement in wood and removes material efficiently during driving. | Coarse threads can be less suitable for thin metal framing because they may not engage the metal consistently. |
| Thread Type | Fine thread | Closely spaced threads designed to engage relatively thin metal framing. | Drywall attached to light-gauge steel studs or metal channels. | Improves thread contact in thin metal and can reduce the chance of coarse threads stripping the substrate. | Fine threads generally provide less effective holding power in wood than coarse threads of the same diameter. |
| Common Diameter | Approximately 3.5 mm (#6) | A widely used nominal diameter for drywall screws; actual dimensions vary by standard and manufacturer. | Single-layer interior drywall installation where the framing and panel thickness are standard. | Balances driving effort, holding capacity, and head size for routine work. | Always confirm the screw length and substrate before use; diameter alone does not determine suitability. |
| Typical Length | 25–32 mm (approximately 1–1¼ in) | Common short lengths for attaching one drywall layer to wood or light-gauge metal framing. | Standard wall and ceiling panels when the screw only needs to penetrate the framing sufficiently. | Reduces the chance of excessive penetration behind the framing. | May be too short for multiple drywall layers, resilient channels, or thick backing materials. |
| Typical Length | 38–41 mm (approximately 1½–1⅝ in) | Longer option frequently selected when additional panel thickness or an intermediate layer is present. | Two drywall layers, drywall over some furring systems, or applications requiring greater embedment. | Provides more usable penetration through the assembly. | Excessive length may interfere with concealed wiring, piping, or other services behind the framing. |
| Head Design | Bugle head | A countersunk head with a curved underside that spreads pressure over the drywall surface. | Gypsum board fastening where the head should sit slightly below the surface without breaking the paper. | Creates a shallow recess suitable for joint compound coverage. | Overdriving can still break the paper and reduce the panel’s holding strength. |
| Drive Recess | Cross recess, commonly Phillips-type | A recessed drive interface designed for controlled torque transfer with a matching bit. | Manual or powered installation of standard drywall screws. | Widely available tooling and simple bit engagement. | A worn or mismatched bit increases cam-out, surface damage, and inconsistent seating. |
| Material | Hardened carbon steel | Heat-treated steel used to provide sufficient hardness for penetration and resistance to drive torque. | Dry interior spaces where ordinary drywall screw performance is required. | Good balance of strength, drivability, and cost for indoor construction. | Carbon steel is vulnerable to corrosion in damp, wet, or chemically aggressive environments. |
| Surface Finish | Black phosphate | A dark conversion coating commonly used on interior drywall screws. | Dry indoor wall and ceiling assemblies that will be covered after installation. | Provides a suitable surface for joint compound and offers limited corrosion protection during normal indoor use. | It is not a substitute for corrosion-resistant fasteners in wet areas or exterior exposure. |
| Corrosion Requirement | Corrosion-resistant coated or stainless construction screw | A fastener with a coating or material selected for higher resistance to moisture-related corrosion. | Bathrooms, high-humidity areas, exterior sheathing, or other locations specified by the project requirements. | Improves service life where ordinary interior drywall screws could rust. | Compatibility with joint compound, treated materials, and local building requirements must be verified. |
| Installation Control | Depth-sensitive screw gun or clutch-controlled drill | A tool setting that stops the screw when the head is slightly recessed without damaging the paper. | Production drywall installation and any work requiring consistent screw depth. | Improves finish quality and helps maintain the panel’s holding capacity. | Incorrect depth settings, excessive speed, or angled driving can still damage the board. |
| Spacing Guidance | Follow the applicable project standard | Fastener spacing depends on panel orientation, framing type, ceiling or wall use, edge conditions, and local code or manufacturer instructions. | All drywall installations where structural, fire, acoustic, or finish performance matters. | Ensures the screw pattern is appropriate for the complete wall or ceiling assembly. | A universal spacing value should not be assumed for every panel type or installation condition. |
| Quality Check | Head seated below the surface, paper intact | The screw head should form a shallow dimple without cutting through the face paper or leaving the head proud. | Final inspection before taping, joint treatment, or painting. | Supports proper compound coverage and reduces visible fastener defects. | Damaged or overdriven screws should be corrected according to the installation method rather than simply covered. |
A 1-1/4-inch sharp point screw usually works well. It should penetrate the wood at least 5/8 inch. Avoid choosing extra length without measuring.
Use a 1-5/8-inch screw for typical wood framing. Check the actual panel and stud thickness first. Conditions vary.
Two 1/2-inch layers may need approximately 2-inch screws. Confirm the framing depth and fastening pattern. Longer is not always safer.
Set the head into a shallow dimple. The paper face should remain intact. A torn paper surface weakens the hold and complicates finishing.
They can work with light-gauge metal framing. Heavier steel may need a self-drilling point. The screw must cross the flange and maintain firm thread engagement.
A bugle head spreads pressure and sits slightly below the surface. This supports a smoother finish. Keep the driver straight to reduce cam-out.
Basic dark coatings generally suit dry interior rooms. Zinc-plated screws handle occasional humidity better. Wet or coastal areas need tested corrosion resistance.
Measure the panel stack and inspect the framing. Test one screw first. Check nearby wiring and plumbing, because an apparently correct length may still cause trouble.
Choosing the right Sharp Point Drywall Screw starts with understanding how its design supports fast, clean installation. The sharp point is intended to penetrate drywall and framing material efficiently, while the screw length should match the drywall thickness and provide sufficient engagement in the stud without protruding excessively. For wood studs, coarse threads usually offer strong holding power, whereas fine threads are generally better suited to metal studs because they form a secure connection without damaging the framing.
Other factors also affect performance. Screw heads should sit slightly below the drywall surface without tearing the paper, making the correct head shape important for a smooth finish. Coatings and corrosion resistance should be selected according to the installation environment, especially where moisture may be present. Finally, confirm that the screw is compatible with the available driver or drill bit. Good grip, consistent torque control, and reliable fastening performance can help reduce slipping, surface damage, and installation time.